Sunday, May 30, 2010

Not my usual style....

Ok, those that know me will say there is nothing "cutesie" about me.  I can be brash, abrasive and loud.  Friends suggested that no one would come to a cardmaking site if it was called "The Brash Stamper" or the "The Abrasive Cardmaker", hence the name I finally settled on for my blog.

But I found these great little stamps from a company called "Cookie Crumbles".  This version is "Tilly" and she is really sweet.  The sayings are pretty cute...there, I've said it.  Cute.  This card is a result of Tilly's "cuteness".
Used Versafine Black ink and inked Tilly and coloured her with distress ink black and a waterbrush; coloured her horn, hooves and udder with a Y003 copic.  Flowers and grass tufts coloured with Marvy markers.  Fence posts were made from a die that makes a whole long line of picket fence which I just snipped off two pieces and pressed over a woodgrain stamp that I inked with distress ink Antique Linen and Brushed Corduroy.  Then I took 28 gauge wire and wrapped it around the posts to make the barbwire.  I stamped the cow and the big flower again on scrap cardstock and coloured them separately, then cut them both out so I could pop them up - just because.  Actually, in my brain, I thought it would look like her little head was hanging over the fence if I popped it up and the flower might appear that it was poking through the wire but it didn't work out that way.  (I admit it, I just like popping stuff up!)

Here's an up close and personal look at the saying.  Pretty cute huh?  Ok, I'll stop it now.
This is a very cute Goose.  She's from Penny Black's set of the 12 days of Christmas. I just used the "7 Geese A'Laying| image.  Then I paired it with a sentiment that I found somewhere - sorry, don't know who made it, but it came with a few other cheeky sayings.  The background stamp is Chicken Wire from Frogs Whiskers and stamped with Antique Linen.  I distressed the edges of the image cardstock and the pumpkin cardstock and inked them with Brushed Corduroy.  I used a brown marvy pen and dotted the ground under the goose and coloured her egss with a white gel pen.  The awning is pumpkin cardstock, edged with the scallop die from Papertrey Ink and inked with Snow Ink from Papertrey Ink and the the small polka dot stamp from same.  White embossing powder makes the dots pop.  I also have a small little stamp that has duck feet which I stamped all over the big pumpkin cardstock in |Antique Linen for the background.  Skinny black ribbon over the awning.  Again, I used a brown Marvy marker to make the dirt dots under her feet and added tufts of grass with a green Marvy marker.  I took my inspiration from a chicken card Anna made but I can't find it on her blog..she's an amazing artist.   Also, an animal lover and I love her blog posts!
This last one was because I was exhausted from dreaming up and putting these two other cards together and it appealed to my sense of humour.  Both images are in the Cookie Crumbles "Tilly" set too.  Used Scattered Straw Distress Ink for the hay bale and then coloured it with a waterbrush from the Scattered Straw and Antique Linen ink pads.  Quick and Dirty.  (I wound up cutting it down to a smaller card as there was way too much white above it.  The card measures 4x4).

Sorry it is so blurry....I changed the settings on the camera and now can't get anything in focus.  Fed up.  Will tackle it tomorrow when I post more cards.  Thank you so much for stopping by and I'd love to hear what you think....?

Saturday, May 29, 2010

Random cards....

In an effort to make up for not displaying cards this week (working 12 hour days downtown can be a drag...however, allows me the financial freedom to buy, buy, buy!  Sorry Captain T....), I am posting some cards I made...thanks for stopping by!

Frogs Whiskers is a great little store in Campbellford, Ontario.  They sell online so you can contact them here...but they have such a neat little stamp called barnboard.  It is so realistic!!  See it here...and I have used it quite a bit; here is another card I made using it....It doesn't really look like much as a stamp but once you use it, I can't believe the detail.  Rose-Marie is very good at designing detailed stamps.  She will even custom-make a stamp for you very reasonably so if you have an idea in mind and would like to see it in a stamp, contact her.  She's a lovely lady and her staff is amazingly helpful and fun to deal with.
For this, I stamped the barnboard in Distress Ink Brushed Courdaroy on kraft paper and while it was still wet, drizzled clear embossing powder randomly in lines horizontally, careful not to cover the entire area.  This is so that some spots showed up glossy, and others were just flat ink.  Wood has such a patina, I was striving for a natural look.

Next, I cut it into strips and took antique linen and ran it over each edge of the strips so that the embossed areas resisted the ink and the non-embossed areas soaked it up to create more patina.  I then staggered the strips to appear like barn boards and used brads as nails.


The butterfly is a digital Hero Arts image, coloured with two shades of blue copics.  I took a black sharpie marker and darkened the black areas and added crystal effects on top of that to darken it.  Popped it up on pop-up dots, took some 25 guage black wire and twisted it on a toothpick and taped to the back.  Sentiment is Inkadinkadoo, nestablilities and stamped with the barnboard stamps while still in the frame.  Black ribbon and brown cardstock and we're done.


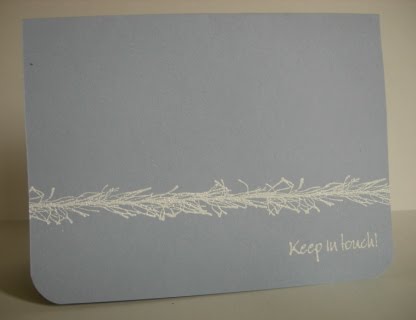
Here is a peach version but instead of stamping the barnboard on kraft cardstock first, I used a soft pink coloured cardstock.  Hard to see but it really gives it a softer look.....sentiment is from Frogs Whiskers and the ribbon is actually two ribbons, brown on the bottom with a peachy thin ribbon taped over top.  I used Papertrey Ink's scallop die to make the trim under the ribbon out of kraft cardstock. 

This is white cardstock as a base under the barnboard....just another version.  I didn't use brads here, just a black sharpie pen to make the nails.  Cool eh?  Don't forget to leave a small space between the strips to show the cardstock underneath as it looks like the shadow between the real boards on a wall.

Friday, May 28, 2010

Cas-Tastic Wednesday Challenge CWC 005

Found this great little site that features another card challenge that I can actually do.  Sometimes I find these really cool challenges but the submissions are so elaborate and so detailed that I feel inferior!  I checked out some of the cards on this site and they are so beautiful, that it makes me want to step up!


Designer Paper = Bo Bunny
Scallop Punch out of white cardstock and then run through the Swiss Dots Folder and Cuttlebugged
Pink ribbon taped to the top and bottom edge of the backside of the swiss dotted piece
Nestabilities for tag, swiss dotted and inked with Pink ink
Inkadinkadoo sentiment
Martha Stewart butterfly punch using scrap Bo Bunny DP
Glue pen used on select parts of the DP paper and butterfly and then sprinkled glitter over those spots (hard to see in the photo)
2 Pink Pearls on butterfly and sentiment

Simplicity's One Layer Challenge 6

Susan over at Simplicity has her 6th challenge posted....layering.   I took a couple of stabs at this one too.  I am loving these thought provoking challenges...
Sentiment Stamp: Fiskars Friends Forever quotes
Background Stamp: Music Notes Frogs Whiskers
(Cut a heart shape out of a large piece of cardstock and used it as a template and stamped the music note stamp over it onto the card)
Inks - Cardinal red from Hero Arts and VersaFine Black
White cardstock


Hero Arts Feather Stamp
Sentiment - Fiskars Friends Forever quotes
Ink- Feather is Hero Arts Silver, edged the stamp with Distress Ink Pumice Stone, Sentiment is VersFine Black ink
white cardstock


Heart Stamp - Stampin' Up
Pawprint stamps - Cloud 9 Design -Simple Thoughts - Dog
Sentiment - Sparkle n Sprinkle - Animals Scratchy series
Inks - Cardinal red from Hero Art, Black is VersaFine Black ink
white cardstock

For this next card, I took some liberties and "layered" the same stamp - this Dandelion that I absolutely love from Frogs Whiskers - in fact, the sentiment is from Frogs Whiskers too.  It was a two part stamp that says "You are My Magic, You are My Joy" and I cut them apart (GASP!)  I do this a lot.  Now I have two great stamps for the price of one.  Check out my other Dandelion cards that are featured over at Frogs Whiskers Blog here, about 3/4 down the page and on the next page too.  It is so versatile!


All Stamps from Frogs Whiskers - Dandelion and "You Are My Magic, You are My Joy" (I cut them apart to make two sayings). 
Inks - Papertrey Snow White Ink (stamped it twice) and white embossing powder
Same Dandelion stamp and used Versamark clear ink and clear embossing powder and stamped over the white embossed image to create a shadow behind the white dandelions)
Brown Bazill cardstock

See shadows here:


Thanks for stopping by!

Tuesday, May 25, 2010

Learning to Colour with Copics

I have just begun to learn how to use Copic markers. They are all the rage and I see designers colouring, shading and giving "depth" to images.  Frankly, they must be freaks!!!  LOL!  I am booked to take the Copic Certification in Toronto in a few weeks, so I am hoping that I too will end up colouring with confidence and, hopefully, skill.

Well....a girl can dream.

So, having said that, please be kind.


Stamps: Background Stampin Up
Leaves: Hero Arts
Butterfly: digital from Hero Arts
Sentiment: Fiskars
Ink Background: Stampin Up Olive
Ink Edges of Card: Hero Arts Orange
Ink Sentiment: black pigment, clear embossed
Leaves - Green Copics 2 shades
Butterfly: Orange Copics 2 shades
Orange Stickles for butterfly wings and three dots under sentiment
Black Stickles for butterfly body

Sunday, May 23, 2010

Dog Tired....

Just came home from the dog show and my head is tired from the noise and my feet are sore from working!   A very nice male Golden won Best in Show and he's owned by some very nice people who deserve to see their boy win big!

Just wanted to post a card I did with Papertrey Ink's set called "Through the Trees".  I love this stamp and use it all the time.  I made Christmas cards for this year already with it...sorry to spill the beans friends and family so I won't show them off quite yet.  However, these aren't the ones I made for Christmas but I love these ones too.


I used the cuttlebug folder on kraft cardstock for the background, layered it on white cardstock and then inked the edges with the red ink (Stampin Up) I used for the sentiment and birdies.  I then stamped the tree image on kraft with white ink and embossed it with white embossing powder.  Sentiment is from a Fiskars set.  Then I inked the same tree stamp with versamark and went over top of the white, embossed image.  Next I clear embossed it so it looks like a shadow behind the original.  Got it?  Here's a close-up....

I stamped the birds with Stampin Up red ink and cut them out, leaving a little white edge around them.  They are very, very tiny and I didn't want them to disappear on the card.

 The next card was one I have seen duplicated quite a few times on various blogs.  You can check out Papertrey Ink's Gallery for this stamp set here.

For this white version, I did exactly the same thing as the above card except I stamped a second image on another piece of kraft cardstock and cut out two of the birch trees and their branches to pop up on this card.  I think it looks pretty neat.  On the left you can see the real shadow it causes and on the right you can just make out the three little pop up squares I used....


I haven't used any of the other images in this set - just these trees and the little birds.  I'll get to the others someday...

Back to the dog show tomorrow.  Teardown and packing up.  I must love them or I wouldn't go, right?

Saturday, May 22, 2010

CPS Card Sketches Challenge

This weeks Card Challenge at CPS inspired me to post this card. 

This also doubles as the card I did for a card challenge that myself and six other ladies participate in every month.  The other ladies' cards can be found here.  Our Group Card Challenge was issued by Donna and her only instruction was for a  red and white card to signify Valentine's Day.  Red isn't exactly my favourite colour but I stepped up and did it.  When I saw the Card Positioning System Challenge 167 Part 4, I knew this one would be perfect.

Flower Stamps - Hero Arts
Sentiment - Fiskars
Ink - Red from Stampin' Up for smudging inside the flowers, Grey ink from Stampin' Up for flower outlines)
Tag - Nestabilities, red ink from Stampin' Up
Vellum Paper (stamp the flowers on the backside of vellum with grey ink)
White gel pen and red marker for dots (also on backside of vellum)
Mat vellum with inkside down on white cardstock
Mat both those pieces onto red cardstock by Bazzil
Red suede for label
Dollar store heart charm
Grey Stickles for corner dots

Friday, May 21, 2010

Simplicity's One Layer Challenge 5


Love to take on this challenge....and couldn't make up my mind which one I liked best so I'm posting all four....

Used button stamps from MSE to look like little ladybugs - I would have liked them to be smaller buttons but you use what you have, right? 

Stamps - MSE Buttons
Sentiment - Fiskars
Bug Trail and antenna - marker
White cardstock

Ink - Colorbox Petal Inks -  Arboretum (stamped the stamp in the centre of the circle of petal inks so that all the colours ink the stamp)
Stamps MSE for button
Sentiment - Inkadinkadoo - Sending Wishes (stamped in the centre of the ink pad to get all the colours on it)
Stitching stamp - Kelly Panacci Borders
white cardstock
corner rounded the edges


Powder Blue cardstock
Ink - Papertrey Snow Ink
Filmy stamp -Hero Arts - I have had this forever and never used it.  I really like it so I'm going to liberate it from its dark drawer.  Be Free....!
Sentiment - Fiskars
Corner rounded the edges

Powder Blue cardstock
Ink - Papertrey Snow Ink
Filmy stamp -Hero Arts
Sentiment - Fiskars
Corner rounded the edges

Thanks Susan for the challenge.  It was fun.
 

Monday, May 17, 2010

Poor Loni Lou...

As a breeder of Golden Retrievers for 27 years, we are quite accustomed to having sick dogs.  It comes with the territory.  However, this week we were very lucky.  There is a lesson here and I want to share it because we could have lost one of our babies.  Trust your instincts.

One of our Golden Retrievers, Loni, was acting odd.  She was still eating but seemed quieter then normal...with four dogs in the house, we are normally delighted to have a "quiet" house, but she was clearly lethargic.  She had a great appetite, but let's face it, Goldens are garbage cans - step on their foot and their mouths open.  She was doing everything the others were but she just looked "off".  I whipped her up to the vet but she could find nothing outrageously wrong with her.  We took her temperature (normal) and drew blood.  To be on the safe side, the vet started her on antibiotics with the idea that she might have a bit of a vaginal infection since she had just finished her heat.

Blood work in the morning confirmed Loni was fighting a huge infection.  As pyometria (a uterine infection) was a strong possibility, it was decided that a spay was necessary.  As she didn't look in distress and was still wagging her tail and grinning at everybody, the vet  booked her for a Friday am surgery spot.

Over the next three days, Loni continued to look grim, despite the antibiotics.  Friday morning I dropped her off to be spayed and waited impatiently for the results.  A part of me wasn't convinced that she wasn't sicker then we had been told but I was thinking cancer.  I know this dog and she was so acting very odd.

The vet called me at noon to tell me that it was a harrowing spay. Loni's uterus was completely riddled with infection and she had been in grave danger of having the uterus explode.  It was what is called "a closed pyometria" which is far worse then an "open pyometria".  With an open pyo, the infection (pus) can be discharged.  With a closed one, there is no where for the pus to go.  Loni's damaged uterus weighed almost 4 1/2 lbs!!!  A typically healthy uterus and ovaries of a Golden Retriever is about 9-11 ounces.  We were very lucky to have made the decision to spay her and not opt for another round of antibiotics to treat the "infection".

Lesson learned: trust your instincts!  You know your pet best (let's face it, the same applies to our children too!).  If you think there's something wrong, then there probably is.  I hate to think of the pain I put Loni through waiting the three days for the surgery but given the signs she was exhibiting, the vet felt she wasn't in distress.   She was more stoic then any dog has the right to be.  I will be very careful with her from now on - she obviously has a very high pain threshold.   The vet said this must have been excruciating for her and feels just as bad as I do.  We will both benefit from this experience.   

I love this photo of Loni - taken in August last year in the motorhome when we were in Florida.  I was reading a book and she decided that I needed a blanket.  Frankly, I think she just wanted a softer bed then the floor!
She is such a cool dog!!

Crazy 4 Challenges - Challenge

I found this great little site called Crazy 4 Challenges and the challenge is for a card with a pocket.  I wanted some inspiration and thought about making a jean pocket card.  I googled that and got this site called "Zazzle" and decided to take this idea and expand on it.

This is what I came up with....


It was fun - challenging - but fun.  Duh....I guess that's the idea....


Stamp for sentiment: Papertrey Ink
Belt is from a cuttlebug folder - Branches I think...
White gel pen for stitching
Pink polka dot ribbon
Flower punch
Tag Punch
Paper for card, pocket, tabs and tag (unknown)

Sunday, May 16, 2010

WARNING!!! THIS POST MAY BE OFFENSIVE TO SOME!!!

Just a heads up. I made this card...well...because I had the sentiment and wanted to make it. Pretty simple. Everyone who I have showed it to has laughed so I'm not the only one who got a giggle out of it.

This site won't be just for cheeky stuff - though I plan on pushing the envelope sometimes (Sorry Mom!) but for the most part, I hope you get a chuckle out of some of the postings. I am capable of doing some really pretty cards which I will share with you too but I hope to keep it interesting so you come back.

Thanks for coming! And be warned!

*Wink*

Stamps - 
Grass - Al Nights Media - Two colours of Marvy markers
Sentiment - MFT - Twisted Sentiments - Colorbox Chestnut Roan ink and clear embossed
Hoes were cut from the Cricut - Paperdolls Cartridge
White cardstock
Corner rounder

Saturday, May 15, 2010

Special Thanks to Liz, Donna and Rose-Marie and Tom at Frogs Whiskers Ink!

Liz is managing the blog for Frogs Whiskers Ink (Rosewood Stamps) and plans on posting the cards that I made for Rose-Marie for the Kitchener Scrapfest a few weeks ago.  Ro asked me to make up some samples to demo at the show and Liz is posting some of them.  Thank you Ladies!  It was a pleasure working for you.  I love being part of the Rosewood family!

"What's Up Chickenbutt?!"

This is the deal.  I love, love, love Susan Raihala's site Simplicity.  She rocks!!  I have evolved from a complicated cardmaker (lots of embellishments, papers, and techniques on one card) to a very simplified version of my former self.

In other words, when I am making a card, I slap the silly alter ego in me that wants to add...and add...and add.  Less is more, you know?  Well, its taken me four years to get the little witch under control but I think I have her mastered.  My hubby only wishes I would find the alter ego that likes to cook and bring her to the surface. Uh, not.  I'd like to have the thighs I had in high school but I don't have any @#$%&!  fairy dust so let it go.  Really honey, I've adjusted to having slappy thighs; you can learn to like chicken fries from Burger King.

Anyway, Susan' has a challenge on her site for a single layer card and this week, she added a twist; we need to add a ribbon.  Who doesn't love ribbon?

With the new blog up and running, I was pretty excited to participate and show her that I too, can create CAS cards.  Ha!!  Not bloody likely.

This is what happened; I love this little chick image from Imaginiesce Snag'em Stamps.  I used this really sparkly black embossing powder by Stampendous to make the little guy pop a little.
 Bart's favourite saying right now is "What's Up Chickenbutt?"  For some reason, it makes her giggle (she's 20 yrs old), but I get it. So the greeting inside is "....Chickenbutt?".
The problem is the damn ribbon.  It doesn't look right.  It's not balanced.  I made three versions.
 
But none work.  Sometimes it doesn't matter what you do, you can't fix a card.  I'm not a ribbon lover today.  I am going to slink off now to my craft room and clean up the disaster that erupted when I tried and tried and tried to pull off a really simple idea.  And blew it.

Susan, I bow to your superiority.

I am not worthy.

Stamps: Imaginisce Snag'em Stamps Bird
Bird coloured with Prism pencil crayons (not well, I might add)
Gingham ribbon from Wal-Mart
Sentiment from a cheap set from Wallie-Mart too

Friday, May 14, 2010

A brand new experience.....

Oh my Gosh!  Consider me officially up and running.  Thanks to my darling daughter, Bart, whose annoying finger prodded my back every day..."Are you blogging yet Mom?"  Not sure that this will be of any interest to anyone but my family, but here goes.....

I do have a bit of a quirky sense of humour.  Ok, ok..., those that know me would say its downright risque but I prefer to call it "Cheeky" --  hence the blog title.  I can only promise that I will warn you before I abuse your sensibilities with my cards or stories.

I got hooked on this addictive stamping habit when I was at a Bed 'n' Breakfast in Orangeville Ontario Canada about four years ago.  I was working that weekend at a dog show and the BnB was run by a clever lady who was a Stampin' Up demonstrator.

Clever, diabolical lady.  She knew a sucker when she saw one.

She was making wedding invitations on the kitchen table when I walked in and it was love at first sight.  Her artistry, her style her mass array of STUFF!  I worked  the dog show by day and raced back to the BnB so she could cavort with me through the meandering maze that is the Cardmaking; stamping (HOLYMOLY!) embossing (WOWEE!)| and glittering (OMG!) all night long.  I think I spent over $300.00 that weekend ordering all the goodies from her and waited with baited breath for the UPS man to deliver my treasures.   I have to confess - the UPS man - Darren - has made so many trips to our house that we now ask about each others' kids.  Nice guy.  I'm thinking he feels kinda sorry for my DH, Captain "T" but he's too polite to say anything.  Though, come to think of it, I have seen them exchange what I can only interpret as commiserating looks as they pass each other in the driveway......

I was so naive then.  *Sigh*  I thought I could just purchase the basics (embossing gun, clear, black and white embossing powder, five colours of pigment inks + Versmark, some coloured cardstock, a set of flower stamps, a set of universal sentiments and another set of mixed images) and be content.  Ha!  I can see you smiling from here.  My craft room is as well stocked as any retail stamping store, much to Captain T's chagrin and my daugher's amusement (She's the true artist in the family and is attending University for Fine Art Design).

I was also initiated into the difference between cardmaking and scrapbooking.  Who knew?  I am clearly a cardmaker.  I don't have the patience or the talent to make a scrapbook.   I want instant gratification and cardmaking fulfills that need quite nicely.  Frankly, I am in awe of scrapbookers and I like to check out their blogs but I admire only.  Much to my mother's disgust as she would love for me to take up that hobby and finally catalog all the photos she has collected in boxes under her bed.  Oh well...I've disappointed her by not becoming a Vet; I figure she's lucky I'm not addicted to body art - ie tatooing or personal piercings (not that there's anything wrong with it - she just doesn't like it). 
 
So, enough about me.  For my very first foray into the blog world, I am going to feature a card I did for a friend to give to her husband.    After you read the inscription, you will understand her relationship with her husband - the same quirky relationship I have with my partner of 27 years.  When I showed Captain T he chuckled and thought they should be mass produced; so I hope I don't offend anyone.

After all, I did warn you.

Stamps: Ducks - Rosie's Roadshow and coloured with Copics, cut out and popped up on dots
Grass- All Night Media and coloured with 2 shades of Marvy green markers 
Sentiment - My Favourite Things - Twisted Too and Versamark with black embossing powder
Cardstock - White